Ink, Stamp, and Watercolor all on one card
Another card today using new techniques that I learned watching videos. It's nice that these pros post such helpful videos, so we novices can do and learn. I don't have all the neat equipment and supplies that they do, but I have learned to make do with what I have. This card took approximately 1 1/2 hours to complete because I was skeptical about what I was doing and using a technique I hadn't used before. But it turned our fabulous if I do say so myself!! LOL!

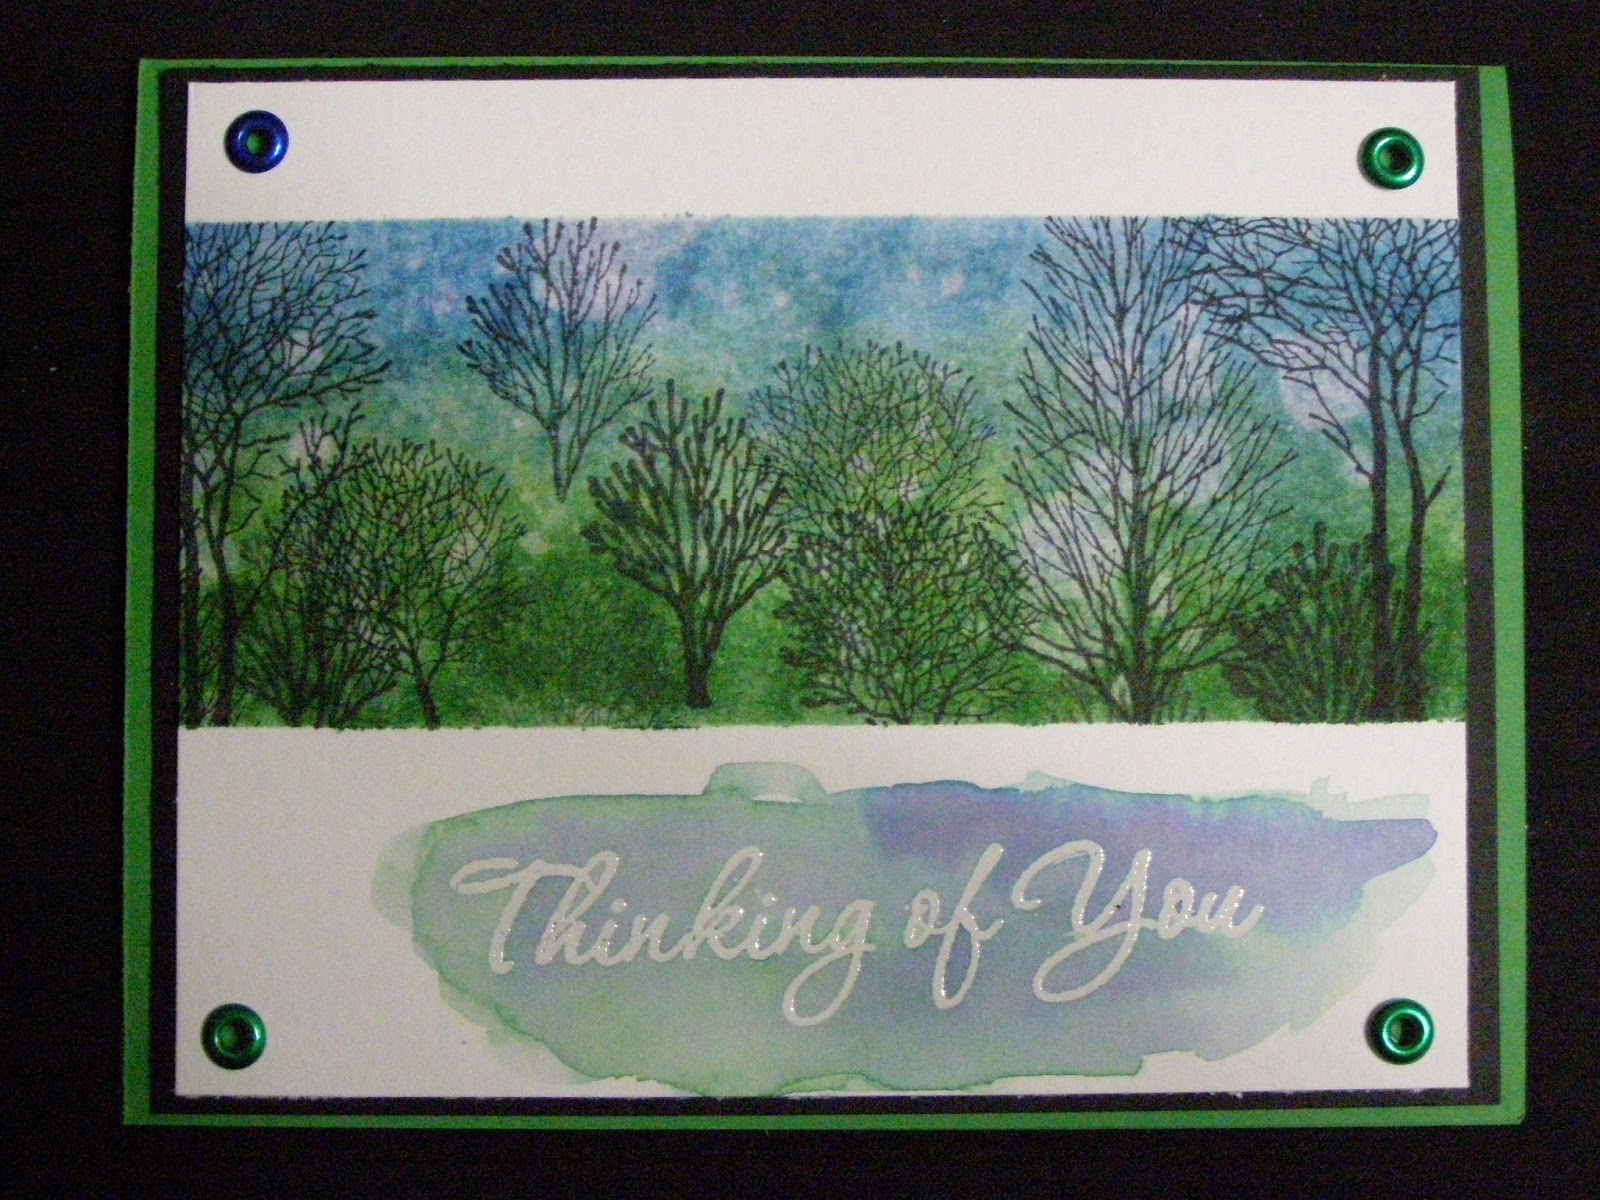
I taped off the top and bottom of white watercolor paper (cold press 140# smooth side) then inked up the strip in the middle with blue and green dye ink from Hero Arts. I dried it well with heat gun, then sprinkled water on it, let it sit for a few seconds then blotted it off. Again I dried it well , then stamped the trees (tree stamp set from Stampabilities) with black dye ink from Ranger. I dried it well, removed tape. I stamped the sentiment with Versamark clear ink, added clear embossing powder, and heat embossed the sentiment. Using the same colors of ink, I put ink on my glass craft mat, added a bit of water to thin to watercolor consistency, then using a soft, round brush, I watercolored over the sentiment. I let this dry on it's own so I wouldn't reheat the embossing. I mounted the card on black Reflections cardstock, punched holes in corners, added eyelets ( I didn't notice until I was completely done that I had one blue eyelet and 3 green ones. I need better light!!!), then mounted the finished front onto a green card base. I also cut a piece of white cardstock and adhered it to the inside of the card for a place to write a message.
That's all for today.
Go, create something!

That is amazing. Beautiful job even with the odd color eyelet. You did use blue and green in the card, so it does match.
ReplyDelete